I probably shouldn’t say this, given that I'm a household advice writer, but there are more than a few corners of my home that are, quite frankly, a chaotic mess. But honesty is the best policy, and so is cracking on and sorting it out. So I thought I’d share my latest satisfying project: organising my kitchen cupboard.
We can probably all admit that our store cupboards aren't as organised as they could be. Whether it's expired cans and spices, ghosts of foodie fads gone by, or things we just don't want anymore.
I got to work sorting out my tiny and definitely overstuffed cupboard to help show you the best ways to keep your food fresh, easy to access and worthy of a Pinterest board.
Why is it important to do a food cupboard clearout?
There are plenty of reasons why having a more organised food cupboard (or pantry, if you’re fancy) can make a huge difference to your home and the general flow of your kitchen, beyond just the aesthetic appeal.
A good clearout is essential for food safety, ensuring you're not cooking with expired or contaminated ingredients. Sealing packets, tidying shelves and cleaning surfaces is also key to avoiding pest infestations. Open packets and loose crumbs are like a neon welcome sign to pests such as mice and fruit flies.
It helps with better meal planning as you're taking stock of what you have, and means you're not cooking with old spices and ingredients that have long since lost their flavour. Unearthing store cupboard ingredients you'd forgotten about could even spark culinary creativity.
Lastly, it prevents waste – how many times have you bought any bag of dried pasta only to discover you have one hidden at the back of your cupboard?
During my own clean-up, I discovered I have a habit of repeatedly buying stock cubes I don’t need – and no matter how many flavours I try, I’m never going to be a granola girl. Both are now firmly crossed off the shopping list.
How to organise your food cupboard
Step 1: Empty it out
Pull everything out into the cold, harsh light of day. Starting with a clean slate helps you assess the space you’ve got and discover what’s lurking at the back. In my case: a soy sauce spill, jam puddle and a scattering of pasta crumbs. Delightful.
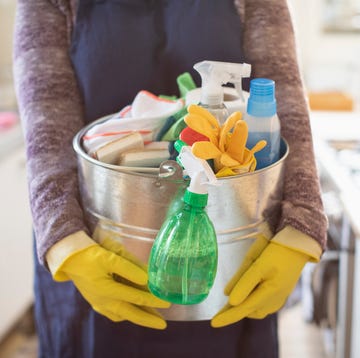
As I removed each item, I checked the expiry dates, chucking anything out of date, open too long or suspiciously empty (guilty). Once everything was out, I gave the whole cupboard a thorough clean, starting with antibacterial wipes, then following up with a nice-smelling multisurface spray for a fresh finish.
Step 2: Categorise
With everything laid out, it's easier to sort items into groups – tinned goods, spices, dried grains, sauces, jars and so on.
I also made a ‘not going to eat this’ pile. We’ve all got them – well-intentioned buys that we’ll never get round to or, as hard as we try to convince ourselves, simply don’t like. But don’t chuck these – remember we’re doing this to avoid food waste. As long as they’re in date and unopened, you can donate them to your local food bank. You can find your nearest site at this link. What might not be to your taste could go a long way for someone else.
Step 3: Repackage
Once you know your categories, you can start to look at how your items are packaged.
Open containers can leave food vulnerable to spoiling and going stale. This is because there’s nothing there to protect them from air and moisture, which cause food to degrade, damaging flavour, texture and overall quality. Not to mention, open packaging means easy access for pests. If you haven’t heard of pantry moths, I highly suggest you look them up.
The fix: airtight containers. It might feel a bit extra, but trust me, once you start, you won’t go back. They prolong shelf life, keep food safe and make everything look 10 times neater. I use clear, stackable ones from Zyliss – great for saving space in my tiny flat-share cupboard. I also use a plastic tray to corral things like sauces and oils – this roller kitchen organiser from Dunelm worked a dream for easy access thanks to its built-in rear wheels.
Bonus tip: add in a film, foil and bag organiser to free up even more space.
Step 4: Add layers
If your cupboard, like mine, is one-dimensional (literally), it can be really hard to actually see what you’ve got. Products slip behind each other and fall out of view, and the next thing you know it, you’re pulling out a can of beans with an expiration date that predates the invention of the internet. Or, in my case, discovering a pack of Angel Delight in my mother’s cupboard that was older than I am.
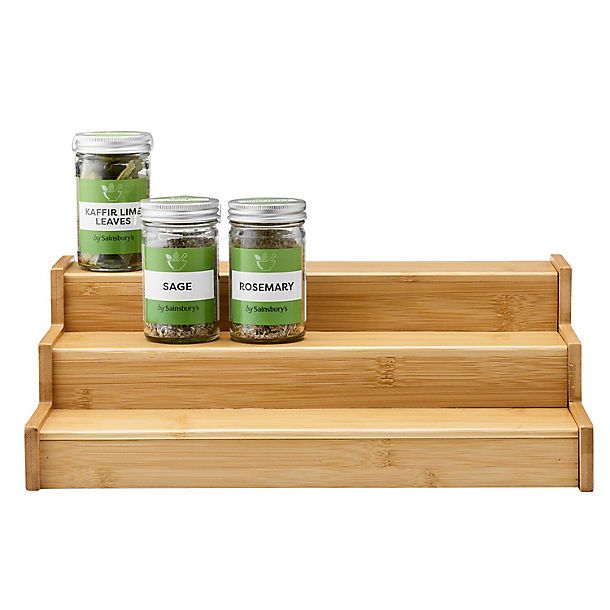
A simple solution? Adding layers. You can get some really effective and stylish cupboard steps that are built to help you see your pantry space a little more clearly, raising the jars and cans at the back. This bamboo shelf organiser from Lakeland is particularly good for spices or condiments, plus it’s extendable so you can customise it to fit your available space.
Step 5: Add labels
Another touch pantry organisers swear by are labels. They're an efficient way to identify what’s now in those shiny new clear containers of yours.
It also simplifies meal planning and helps prevent food waste. Add expiry dates to labels if you’re prone to forgetting – it’s a great visual reminder to use certain items first. These chalkboard labels from Kilner are not only adorable but strategic; if you change what’s in your containers, you can wipe away and start again.
Step 6: Assemble
Where you put things back really matters. It shapes how you cook, what you reach for and how easily you can assess what you’ve got.
Implement the first in, first out method, which means stacking items according to expiration date and when you purchased them. New products have to go to the back of the row to ensure you eat everything in order and to avoid can-hoarding (guilty yet again).
Think about the ingredients you use the most – things like oils, seasoning condiments, stock etc. Make sure these are towards the front of the cupboard and don’t require too much manoeuvring. For example, I put my most-used items together in a container at the front. Since I use at least one of these ingredients in every single thing I cook, I can just pull out the box and slot it back in when I’m done for ultimate convenience.
After all, that’s what we’re after. A way to keep out food fresh, cupboards cleaner and life easier – minimal effort required.


