When Shellac and gel manicures first revolutionised the nail polish market, those of us on the GH beauty desk couldn’t have been more thrilled. Finally, we had a varnish that stayed on our nails no matter what, making manicures last for weeks rather than days (or, at worst, hours). But this longevity, as gorgeously groomed-looking as it initially is, can prove a little tricky when you actually want to remove your gel mani at home.
While we’d ideally recommend heading back to the salon for a take-off – as that’s the best way to make sure it’s safely and professionally done – we know that sometimes time and funds don’t quite allow for it. Whether you’ve seen a chip in your mani or you’re craving a fresh new set, the temptation to pick away at the gel yourself is all too common.
Truthfully, we’ve all done it once or twice. But according to Leighton Denny MBE, nail expert and founder of his namesake nailcare brand, the damage caused by picking gel nails means it’s never worth it (not even once!). ‘When people do this, I see layers of the natural nail being stripped away, leaving thinning, peeling and even painful nail beds,’ he says.
What to read next
And once the damage is done, recovery can take months, if not years, says Catalina Gorgeous, Nails & Brows Mayfair’s senior manager. ‘It creates a rough, flaky surface which not only makes future gel applications less smooth and more prone to lifting, but makes the nails more susceptible to fungal or bacterial infections and prolongs the recovery time.’
All of which begs the question: how exactly then, do I remove my nails at home without damaging them? Thanks to Leighton and Catalina, we got the full breakdown with a step-by-step, plus every tool you’ll need to help you.
Firstly, what’s the difference between removing Shellac and gel?
To be clear, the method for soaking off both Shellac and gel at home is the same. The (small) difference between the two manicures is that Shellac is the brand name for a hybrid polish-gel formula, while gel is the generic term to cover any soft gel manicure formula. But since both are designed to be semi-permanent, picking off either is a big no-no, as it will leave your nails underneath weak, vulnerable to damage and liable to break.
So for purposes of this piece, we’ll refer to them interchangeably.
It’s important to note that the following advice is specifically for removing Shellac and soft gel manicures. It doesn’t apply to anything described as ‘hard gel’ or ‘builder gel’ (like BIAB) which should definitely be removed professionally.
Why is the salon the best option for removing gel nails?
Leighton puts it simply: ‘professionals just have the right tools and techniques to do it safely.’ In terms of tools, this is high-grade acetone remover and precision buffers. While making sure the removal process is as effective and gentle as possible, professionals will also minimise the risk of damage to your natural nails as they can offer expert advice on the kind of nail care you personally require.
‘It’s also more efficient and less messy than a DIY attempt,’ adds Catalina. ‘We know exactly how long to soak for, and how to remove gel without harsh scraping, over-filing your natural nail, or using aggressive techniques that cause splitting.’
And importantly, thanks to their expert training, in-salon nail artists can easily assess whether you’re wearing hard gel (which doesn’t soak off) or soft gel (such as Shellac), so there’s no need for any potentially risky guesswork. As Leighton warns: ‘Attempting to remove hard gels yourself can cause severe damage.’
If I have to do an at-home removal, what will I need?
Catalina says that if you get gels often or your nails are already weak, going back to the salon to get them removed is a smart investment in nail health. ‘But if you want to DIY every now and then, just be sure to get the necessary supplies and follow the safe removal steps closely,’ she explains.
‘Removing gel polish at home requires a bit of patience and the right tools,’ says Leighton, including…
- High strength acetone
This is important for soaking off the gels. Catalina says at least 90% acetone is best. She adds: ‘If acetone is too harsh on your skin, apply a light layer of petroleum jelly or cuticle oil around your nails before wrapping to protect them.’
- Cotton balls or pads
You can cut these into quarters so they’re a better size fit for your nails.
- Aluminium foil
Leighton recommends cutting these into small (approx 3x3 inch) squares.
- Nail file
‘For buffing the top layer of your gel, you’ll need a traditional medium-grit (180 grit) nail file,’ says Leighton. ‘This will help break the seal of the gel effectively without being too harsh.’
- Cuticle oil
‘This is designed to hydrate, nourish and soothe dry cuticles,’ explains Leighton. With regular use, a good cuticle oil will also reinforce your nail bed and help to prevent hangnails.
How do I remove Shellac or gel polish at home?
Step 1: File the top layer
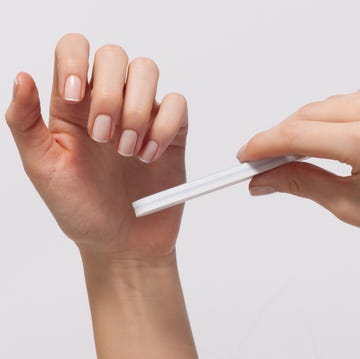
Begin by gently filing the top layer of the gel polish with your file, buffing it over each nail to remove the top coat. According to Leighton, ‘the goal here is to break the seal of the top coat – using a medium-grit file is ideal, as it’s effective without being too abrasive.’
‘You don’t want to file down to the natural nail,’ reminds Catalina. During this step, you want to file just enough to allow the acetone to penetrate through the gel.
Step 2: Soak your cotton pads
By cutting your cotton pads or balls into quarters as Leighton suggests, they will fit neatly on to each nail.
Simply saturate each one thoroughly with your chosen acetone, so that they’re ‘wet but not dripping excessively’.
Step 3: Apply your cotton pads and foil to the nails
‘This is what I like to call a “wrap it up” stage,’ explains Leighton. ‘By placing the soaked cotton on each nail and wrapping it with aluminum foil tightly, this not only holds it in place, but creates a warm, sealed environment to help the acetone penetrate the gel.’
For ease, Leighton recommends working one hand at a time, for this step. This also prevents the acetone from sitting on your skin for longer than necessary.
Step 4: Wait!
In Catalina’s experience, it’s important to wait at least 10 to 15 minutes in order to let the acetone work its magic. Leighton also notes that if the gel is particularly stubborn, you may need to wait a little longer (sometimes up to 25 minutes).
Pro tip from Leighton: ‘Periodically check one nail to see if the gel has started to lift and soften.’
Step 5: Gently scrape the softened gel off
When time’s up, remove one foil and cotton wrap and you should see that the gel underneath appears lifted, flakey and even gooey-looking. ‘Use a cuticle stick to gently push off the softened polish, but never force or scrape hard or you could damage your natural nail bed,’ warns Catalina.
I’ve wrapped, soaked and waited, but I’m still struggling to get the gels off. Why?
Again, patience is key. ‘You may need to repeat the soaking process,’ Leighton explains. ‘If you’re still struggling to get the soft gels off, it could be due to the quality of the gel used or the thickness of the application.’
Catalina adds that under-soaking and improper filing can also cause home removal to fall short. ‘Always ask your technician what brand of gel polish they will use on your nails and what the correct removal procedure is – this will save you time and prevent headaches.’
Hard gels (which are specifically formulated to be more durable) are notoriously harder to remove, so if you suspect that’s what’s on your nails, head to the salon rather than trying to shift them at home.
Step 6: Clean up any residue
It’s vital to wash your hands thoroughly (just use soap and water as usual) after removing gels, as this will eliminate any acetone residue.
‘You can also buff your nails lightly to smooth any remaining traces,’ says Catalina. ‘After washing the hands, I like to apply a moisturiser to rehydrate both the nails and skin.’
What is the best aftercare for natural nails once gels are removed?
Gel removals, even when done expertly, can leave your natural nails feeling fragile or simply dehydrated (thanks to the acetone, which is typically drying). The key? A consistent nail care routine, which over time, will help nails to recover and strengthen more quickly.
‘I recommend my Renovate Cuticle Oil for instant nourishment – the formula contains vitamin E, pro vitamin B5 and a blend of eight hydrating oils such as almond, avocado and rice bran,’ advises Leighton.
‘My single-dose Nail Rebirth Capsules are also like a concentrated boost for your nails, as they are packed with neonyca and jojoba, which are proven to strengthen and repair damaged nails – especially those which are left feeling thin, brittle or ridged after removal.’
He also recommends incorporating a crystal nail file into your nail care routine, to be used after the gel is removed. On natural nails, a crystal file will promote healthier, stronger nails while speeding up the buffing process.
Post-removal, you might find that your nails are weaker and more prone to breakage or bending, so a consistent care routine and a focus on long-term nail health and maintenance are essential. The Hydra-Flex Treatment Regime from Leighton Denny targets nail strength from within, creating an invisible barrier to lock in moisture and protecting from daily wear-and-tear, which is vital especially while the gels are freshly removed.
